Install Sphinx and Myst
To deploy this guide from coderrefinery , follow these steps…
A. Install Sphinx.
Win: pip intall -U sphinx
Linux: apt-get install python3-sphinx
Mac (MiniConda):
  curl -O https://repo.anaconda.com/miniconda/Miniconda3-latest-MacOSX-x86_64.sh
  bash Miniconda3-latest-MacOSX-x86_64.sh

Test Environment:
  conda info --envs
  conda env list

Turn Conda Off / On:
  conda deactivate
  conda activate

Create Environment:
  conda create --name Sphinx
  condo activate Sphinx

Install Sphinx from Conda-Forge:
  conda install -c conda-forge sphinx
  conda list -n sphinx

Install Sphinx Conda Packages:
  conda install -c conda-forge sphinx sphinx_rtd_theme sphinx_copybutton myst_parser sphinx_design myst-nb sphinx-tabs

  pip install sphinx_rtd_theme
  pip install sphinx_copybutton
  pip install myst_parser
  pip install sphinx_design
  pip install myst-nb
  pip install sphinx-tabs
Check version:
sphinx-build --version
1. Install support packages from terminal.
pip install sphinx_rtd_theme
pip install sphinx_copybutton
pip install myst_parser
pip install sphinx_design
pip install myst-nb
pip install sphinx-tabs
Install Pycharm or VSCode to view .rst files and to create .md markdown files.
language = en
html_theme = 'sphinx_rtd_theme'

extensions = [
              'sphinx.ext.autodoc',
              'sphinx_copybutton',
              'sphinx.ext.autosectionlabel',
              'myst_parser',
              'sphinx_design'
              'sphinx-tabs'
             ]

myst_enable_extensions = [
                          "colon_fence",
                          "html_image"
                         ]
4. Add and Update .yml file for gitpages.
.github/workflows/docmentation.yaml
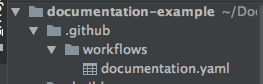
The contents of the yaml file must include commands to install the extensions.
    name: Docs
on: [push, pull_request, workflow_dispatch]
permissions:
    contents: write
jobs:
  docs:
    runs-on: ubuntu-latest
    steps:
      - uses: actions/checkout@v3
      - uses: actions/setup-python@v3
      - name: Install dependencies
        run: |
          pip install sphinx sphinx_rtd_theme
          pip install myst-parser
          pip install sphinx_copybutton
          pip install sphinx_design
      - name: Sphinx build
        run: |
          sphinx-build doc _build
      - name: Deploy
        uses: peaceiris/actions-gh-pages@v3
        if: ${{ github.event_name == 'push' && github.ref == 'refs/heads/main' }}
        with:
          publish_branch: gh-pages
          github_token: ${{ secrets.GITHUB_TOKEN }}
          publish_dir: _build/
          force_orphan: true
Above, we see that there is a ‘pip install extension’ command for every extension we deploy.
Attention
Warning: Mac Machines hide files starting with ‘.’
To make the invisible, visible, enter the following into the terminal.
Type defaults write com.apple.Finder AppleShowAllFiles true
Type killall Finder
Build
This is the command to build using Coderefinery’s setup.
sphinx-build doc _build
We can use auto build to detect changes in code and trigger the build cycle on saving.
pip install spinx-autobuild
or if using python3:
python3 -m pip install sphinx-autobuild
Run using:
sphinx-autobuild doc _build
Point Browser at:
http://127.0.0.1:8000
Changes will be autoloaded in the browser upon completion.
Test HTML pages TEST links
Inside the cloned repository, check the integrity of all internal and external links:
sphinx-build doc -W -b linkcheck -d _build/doctrees _build/html